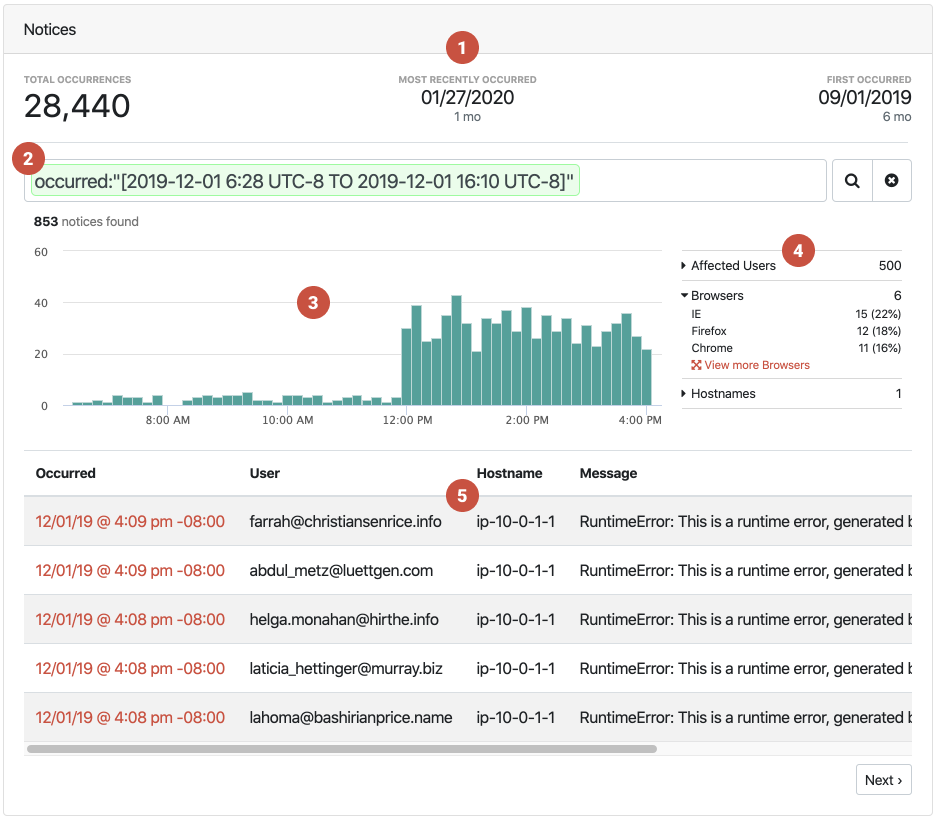
Our new Notice Search gives you more tools to find information about individual Notices. We think this will come in handy when you need to track down specific details about your errors. Here is a screenshot:

- Overall notice counts and key dates have been shuffled around to give more emphasis.
- Full featured searching based on data points contained within your Notices.
- Enlarged interactive timeline showing the time distribution of your error notices.
- Common aggregated values based on search results
- A paginated list of Notices you can scan and select to view details.
The search functionality should feel familiar, as it works exactly like our Project search only constrained to data found within your Notices. For the launch of the new search we are aggregating some common data points for you: Affected Users, Browsers, and Hostnames.
It’s about your Users
Let’s face it, no matter how hard you try, bugs are going to happen. How you respond to a customer-affecting bug or outage can make the difference between losing customers and building confidence. We built Honeybadger so you can be alerted as soon as possible, but we also provide tools so you can be informed about which users have been impacted, which we call Affected Users.
I want to share two essential tips for how to make the most of the new search and our Affected Users feature.
Tip #1: Adding the right context
Our Honeybadger client can track contextual data during the lifecycle of your app (we call it Context). Just give Honeybadger some data you care about, and if an error happens, we will present that data in the resulting error page. There is one piece of context data that gets special treatment, and that is user info (either email or id). Our Affected Users features are reliant on this supplied context data.
If you haven’t done it yet, we think adding the user to context should be your next commit in production.
Here is one way you can add the currently logged in user if you are using Rails and Devise:
class ApplicationController < ActionController::Base
  before_action :set_user_context

  def set_user_context
    Honeybadger.context(user_email: current_user.email) if current_user
  end
end
All of our clients support adding context, so consult our documentation for your specific runtime.
Tip #2: Tracking Deploys
One more feature you should take advantage of is Deploy Tracking.
It’s really simple to set up. As long as your system for deploying has any form of post hooks, you could write some Ruby code, build a simple curl, or even integrate with some CI tools we have made just for you (Github, CircleCI).
Putting it all together
With these two things in place, you can now visualize and track all your Affected Users since the last deploy. Let’s see how this works with the new search (BTW, it behaves the same as in our Project search). In the search hint modal, an option for “Since Deploy” should appear, and upon selecting it, the deploy time will be injected into your query:

The “Affected Users” aggregate drop down lists the top 3 affected users (sorted by the amount of times they were affected).

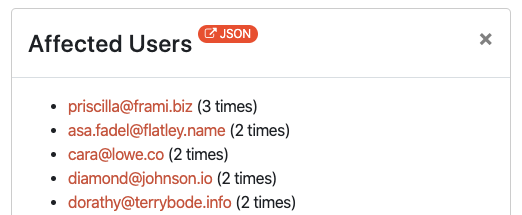
You can select the bottom link to open a modal containing a listing of all affected users within the query results:

We also added a link in the Affected Users modal (see screenshot above) that takes you directly to our API with a JSON payload containing all Affected Users. The search query is persisted so you can save this and use it outside of Honeybadger if you want.
We like to be proactive if any of our users have been adversely affected by a bug. Often that means sending an email explaining the situation. These tools will allow you to do the same for your users.
Enjoy
We hope this updated search functionality will help you both debug quicker and serve your users better! Give us a shout and let us know of any requests or issues you run into while using the new search.


