Confession time. My development environment hasn't changed much in the four years I've worked on Honeybadger. But in that time Honeybadger has become a lot more sophisticated, depending on around ten services to function.
That's why we've been moving towards Docker for local development. Instead of every developer having to set up Postgres, Cassandra, Memcached and the rest, we can use docker-compose to spin up a pre-made environment. It's awesome.
Naturally, I started to wonder how easy it would be to deploy a Dockerized application.
Deploying With Docker
Docker comes with utilities like docker-machine and docker-swarm which are supposed to make deployment painless. So far they haven't delivered on that promise. If you'd like to read all about their deficiencies, check out this recent hacker news post.
That's why I chose to focus on Amazon's ECS (EC2 Container Service).
What's ECS?
ECS is kind of like a grown-up, production-ready mashup of docker-compose and docker-swarm.
With ECS you can say "Run three copies of my web app" and it will intelligently spin up the appropriate Docker containers inside your cluster of EC2 instances.
It can load-balance requests across your containers, and can scale your cluster up or down depending on load.
Creating a Dockerized Sinatra App
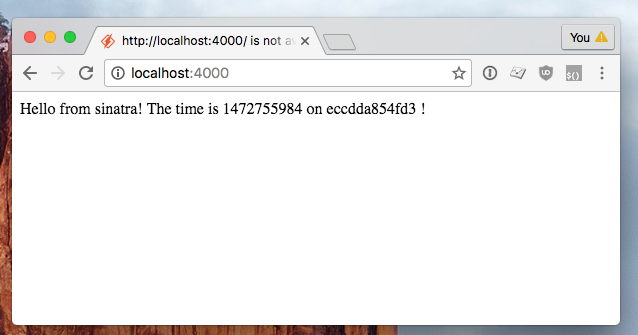
Here's a simple Sinatra app. It prints the current time, so you'll know if you see a cached version. It also prints the name of the computer running the app. Later on, we're going to be spinning up multiple servers running this app and using a load balancer to route requests. By returning the hostname, we can tell which server served a particular request.
The App
The Dockerized Sinatra app I'm about to show you is a heavily rewritten version of tcnksm-sample/docker-sinatra.
require 'sinatra'
require 'sinatra/base'

class App < Sinatra::Base
  get '/' do
    "Hello from sinatra! The time is #{ Time.now.to_i } on #{ `hostname` }!"
  end
end
Here's the Gemfile:
# Gemfile
source 'https://rubygems.org'
gem 'sinatra'
gem 'thin'
...and here's the config.ru file:
$:.unshift(File.dirname(__FILE__))
require 'app'
run App
The Dockerfile
We'll need a Dockerfile to create a Docker image for this app. It creates the directory for the app, copies the files over, and runs a web server on port 80.
FROM ruby:2.3.1-slim
RUN apt-get update -qq && apt-get install -y build-essential

ENV APP_ROOT /var/www/docker-sinatra
RUN mkdir -p $APP_ROOT
WORKDIR $APP_ROOT
ADD Gemfile* $APP_ROOT/
RUN bundle install
ADD . $APP_ROOT

EXPOSE 80
CMD ["bundle", "exec", "rackup", "config.ru", "-p", "80", "-s", "thin", "-o", "0.0.0.0"]
Building and Running the Image
First, we're going to tell Docker to build an image out of the Docker file in the current directory. Then we'll run it, mapping the container's port 80 to localhost:4000.
docker build -t docker-sinatra .
docker run -p 4000:80 docker-sinatra
To check if it worked, open up localhost:4000 in your web browser. You should see something like this:
Deploying to ECS
Now let's deploy to ECS. We're going to use their setup wizard. Is that cheating? I don't care. :) So head over to the ECS control panel.
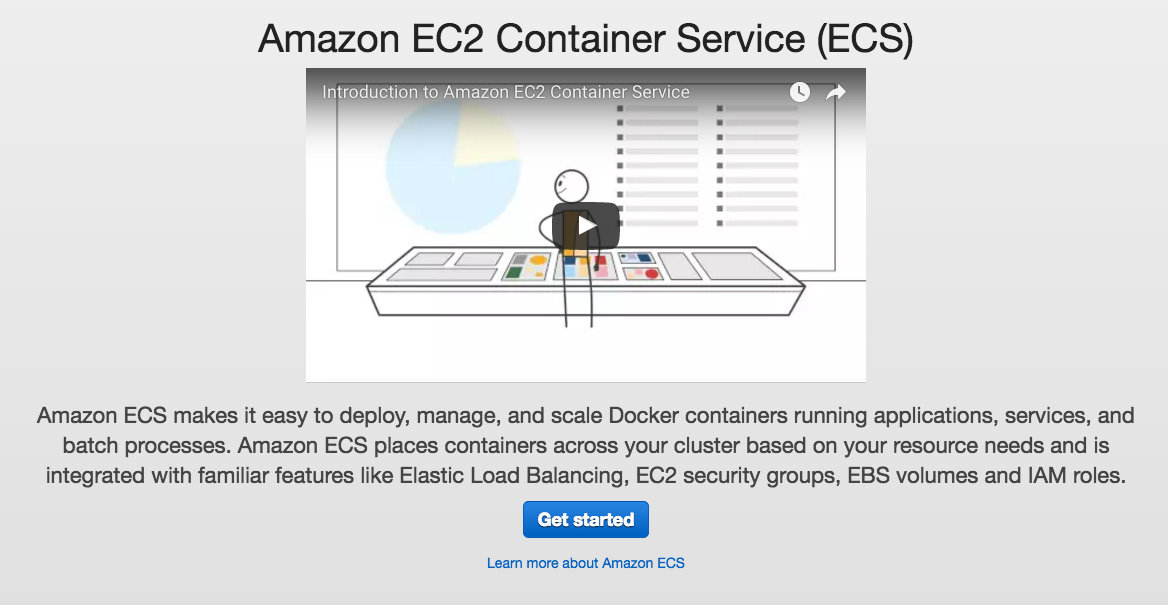
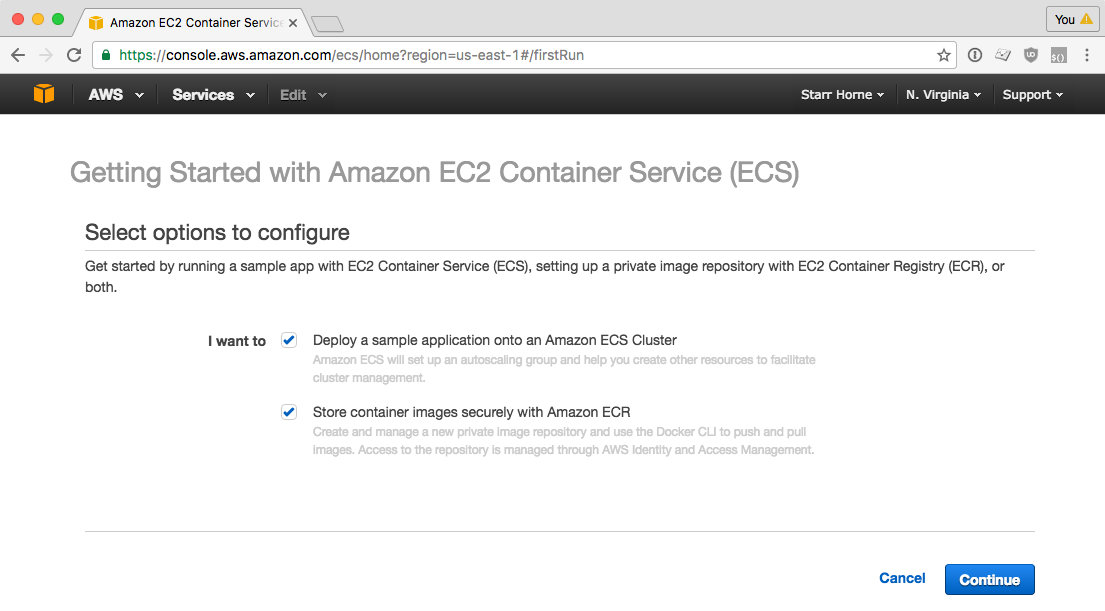
Click "Get Started." Then click "Continue" on the next screen."
Creating your Docker registry
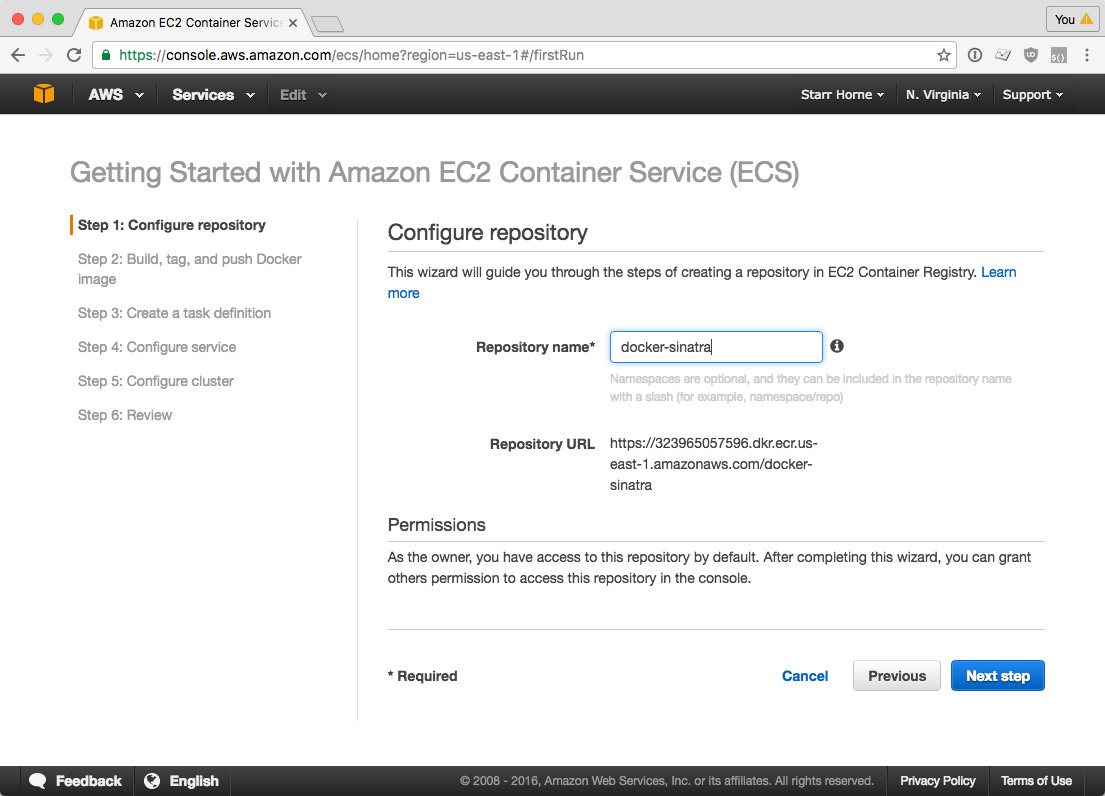
You typically don't upload Docker images to a production server from your development environment. Instead, you send the images to a Docker registry -- like dockerhub -- and the server pulls them on deploy. Amazon provides a private Docker registry. It's not a requirement that you use it, but we're going to for now.
I'll name my registry "docker-sinatra":
Pushing your Image to the Registry
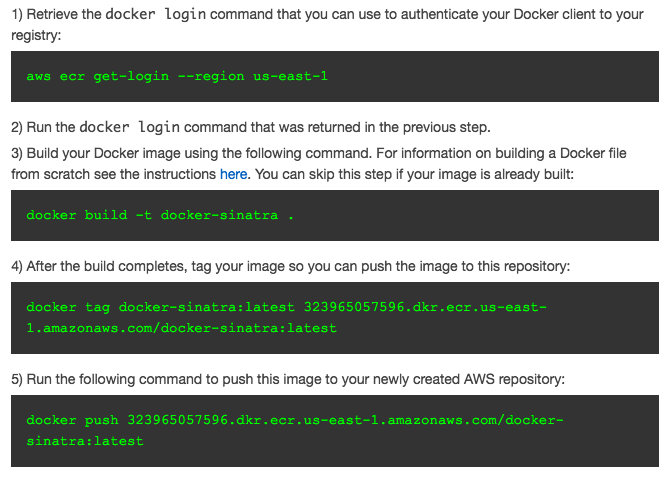
Then, I'm given a list of commands to run to build my image and push it to the registry.
The first time I tried this, my browser's ad-blocker prevented the commands from being displayed correctly. Weird - I know.
Creating your Task Definition
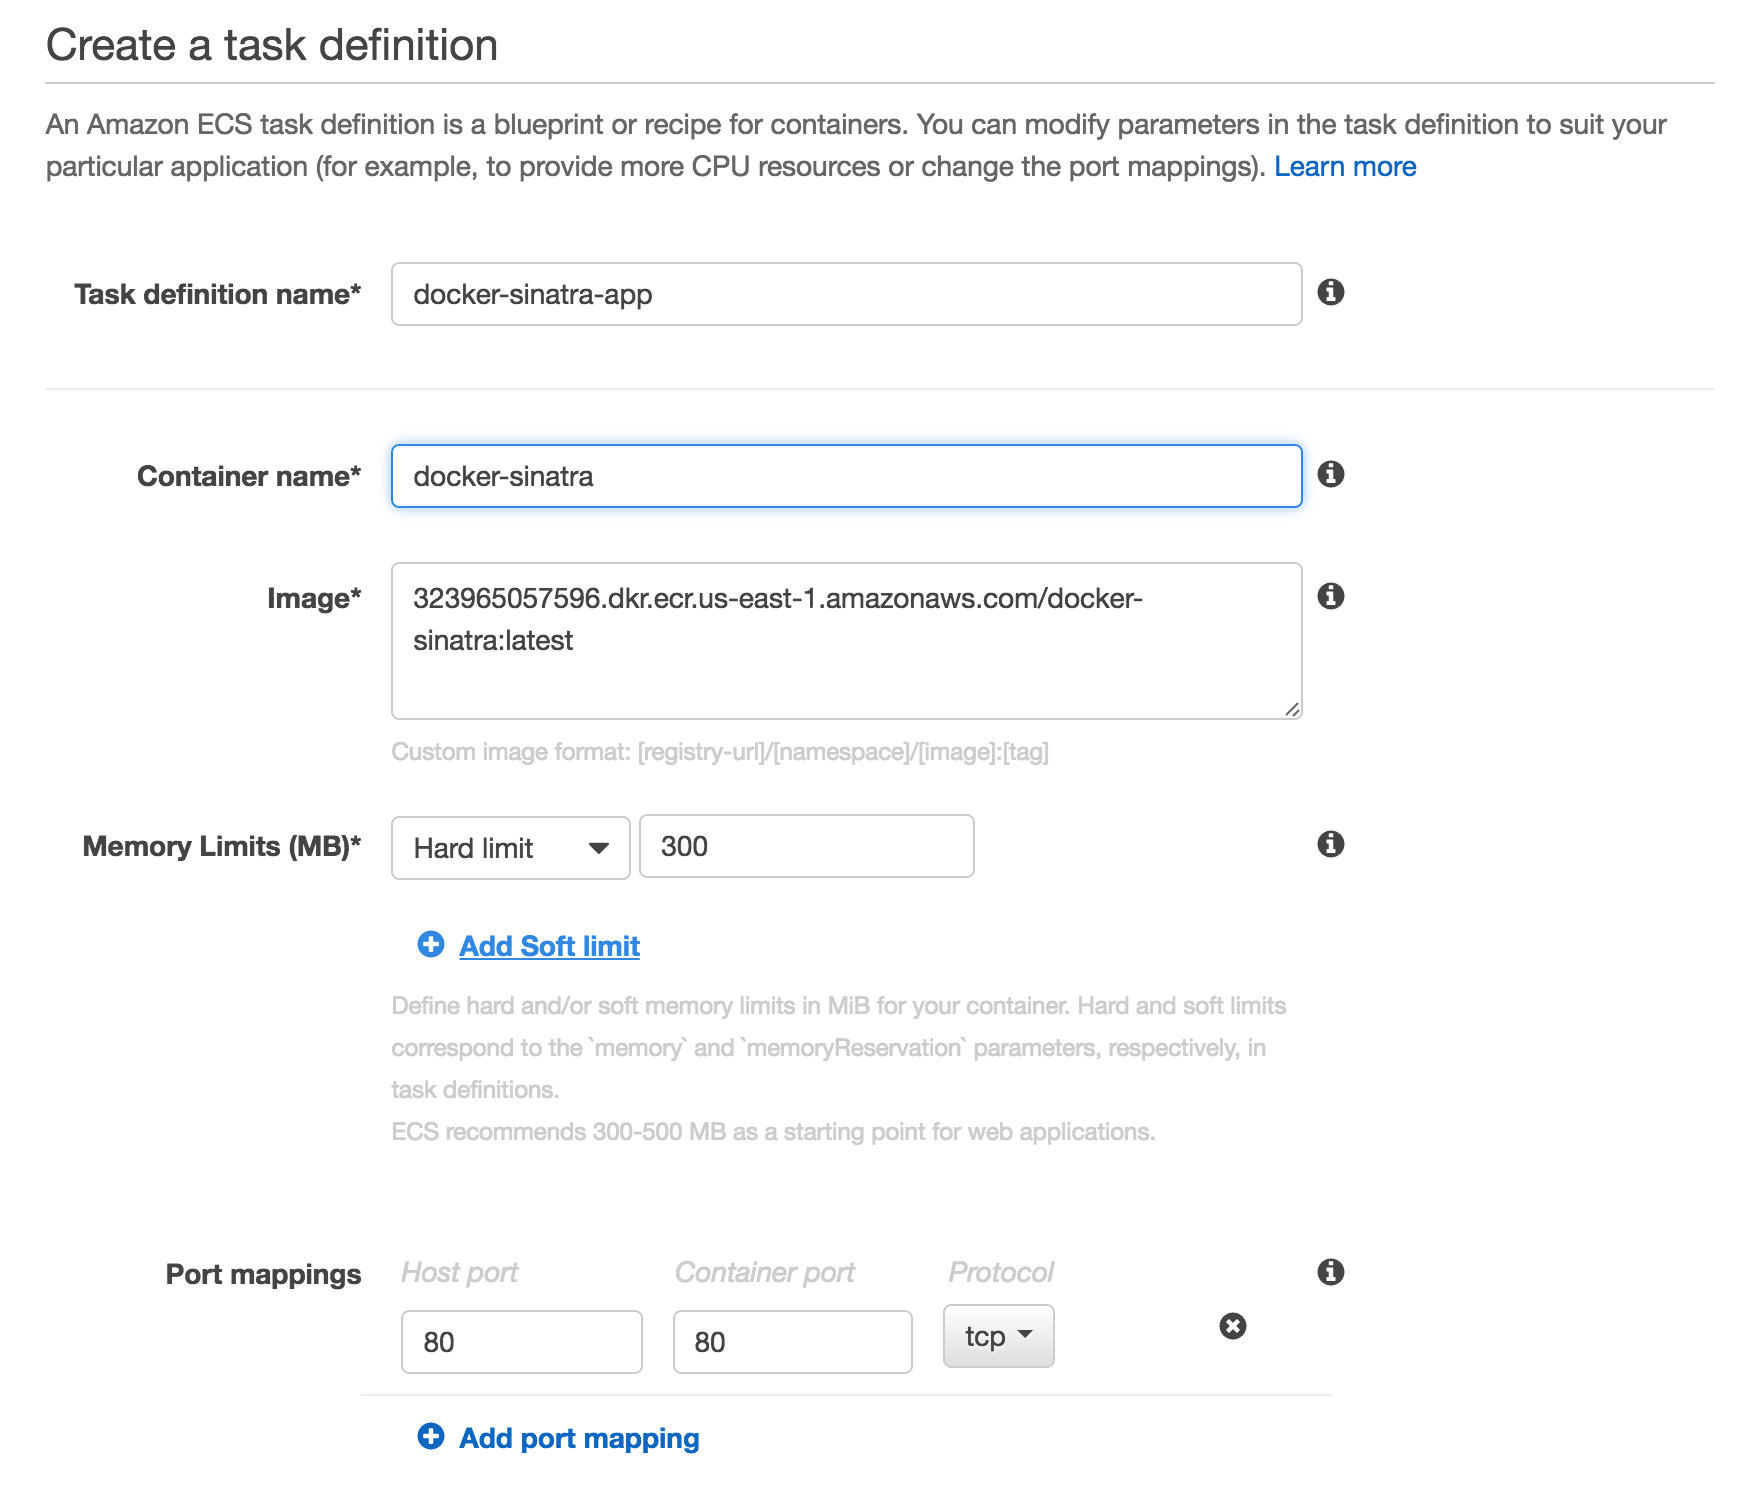
AWS loves making up new, confusing, terminology. A "task definition" is simply a list of containers that should run together. It's kind of like a Procfile, or a docker-compose configuration.
So, if your application has one container running Nginx, one running Unicorn, and one running Sidekiq then all three might be contained within your "task definition."
Our app is much simpler. We only have one container. So the configuration is minimal.
- I'll make sure the correct image pulls from our registry
- I'll map port 80 from the container to port 80 on the EC2 instance running the container.
Creating your Service
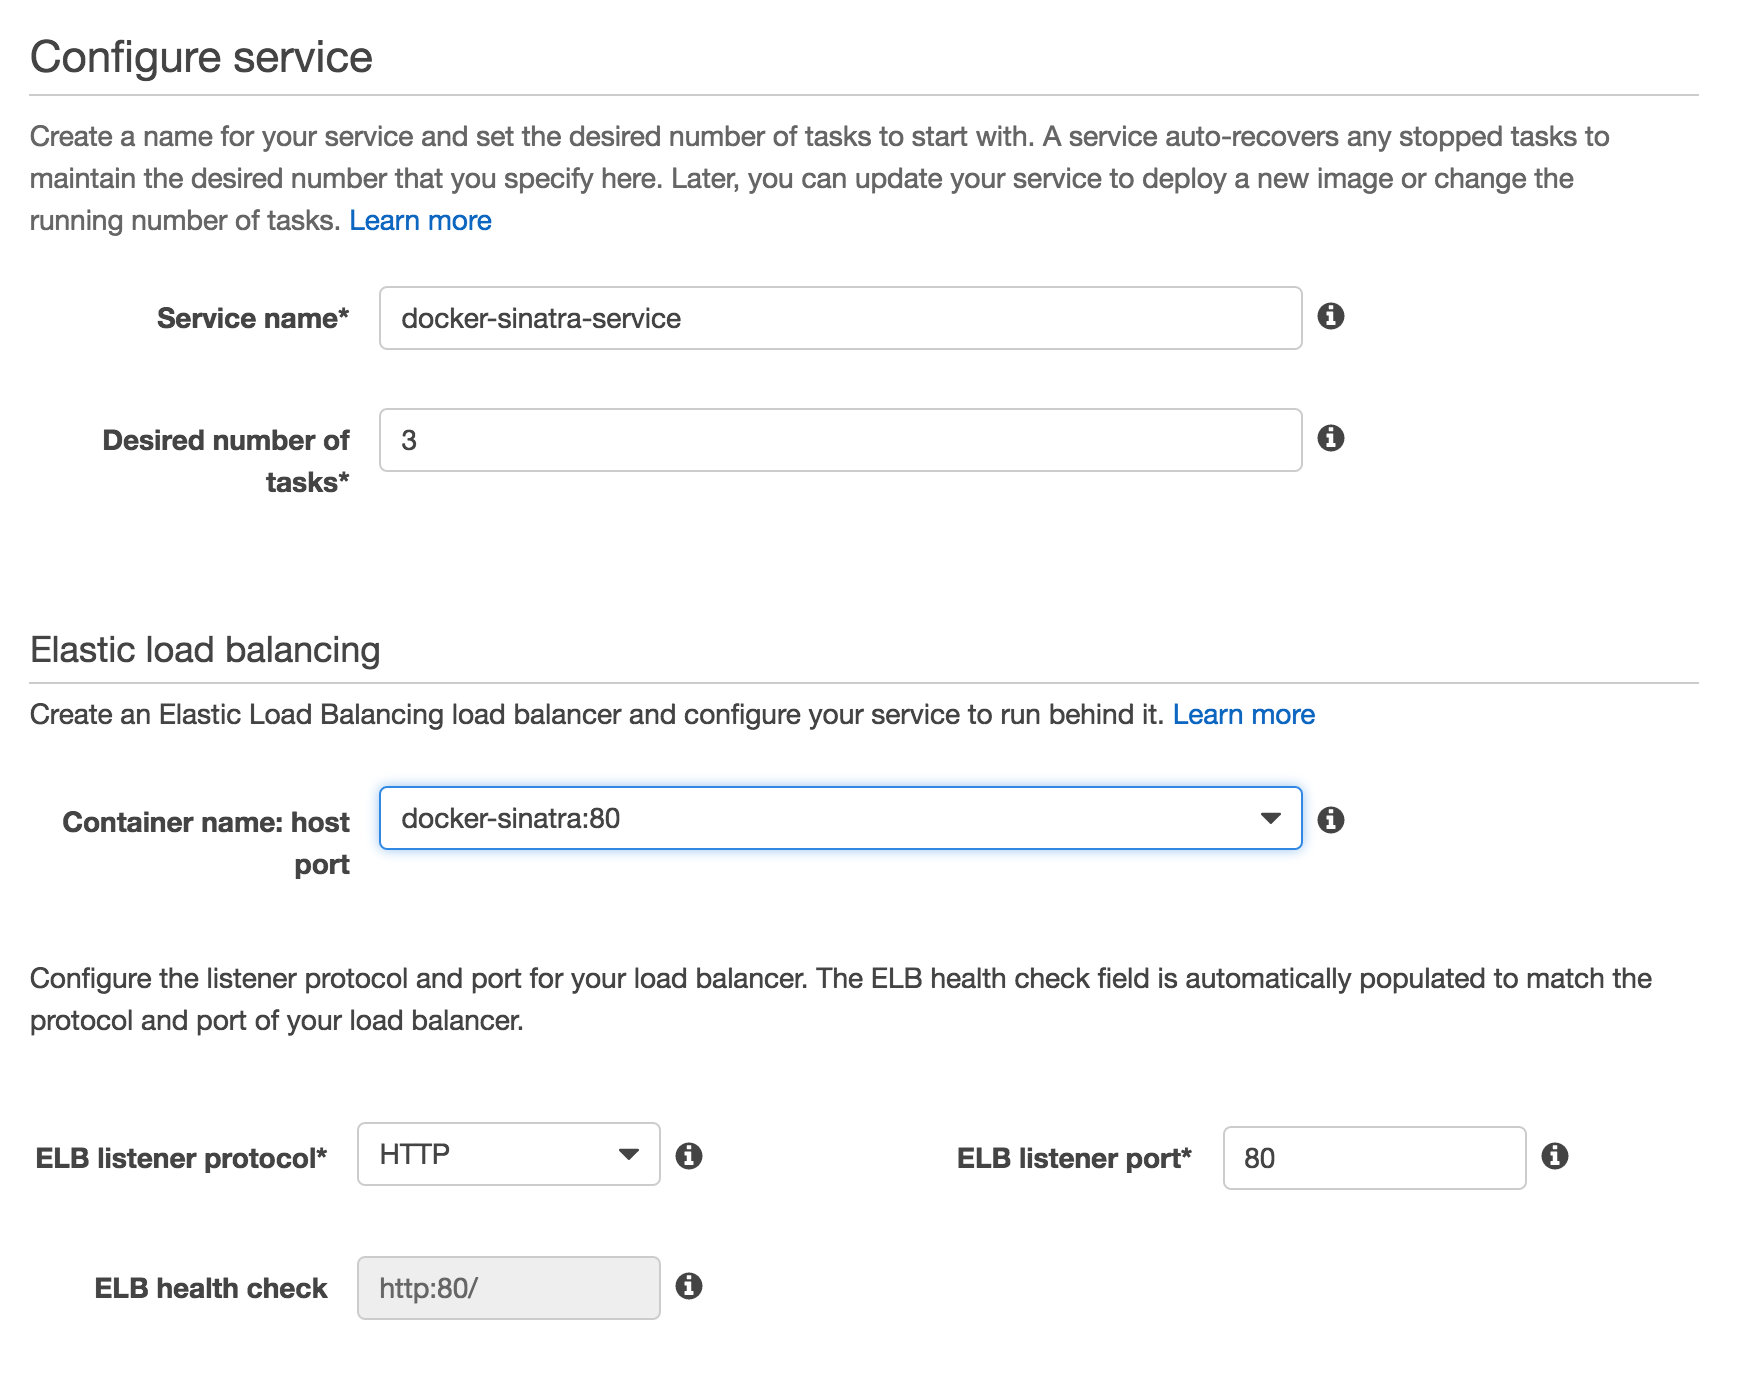
More confusing terminology! The "service" configuration lets you specify how many "tasks" (a.k.a. copies of your app) should run, and how they're load balanced.
Here, I want three copies of my app to run, with load balancing on port 80.
Spinning up your Cluster
A cluster is a bunch of typical EC2 instances that are running Amazon's ECS software. You can do anything with them you could do with any other EC2 instance. In this case, I specified I wanted three t2.micro instances.
After a few confirmation steps and a wait of about 5 minutes, everything was ready.
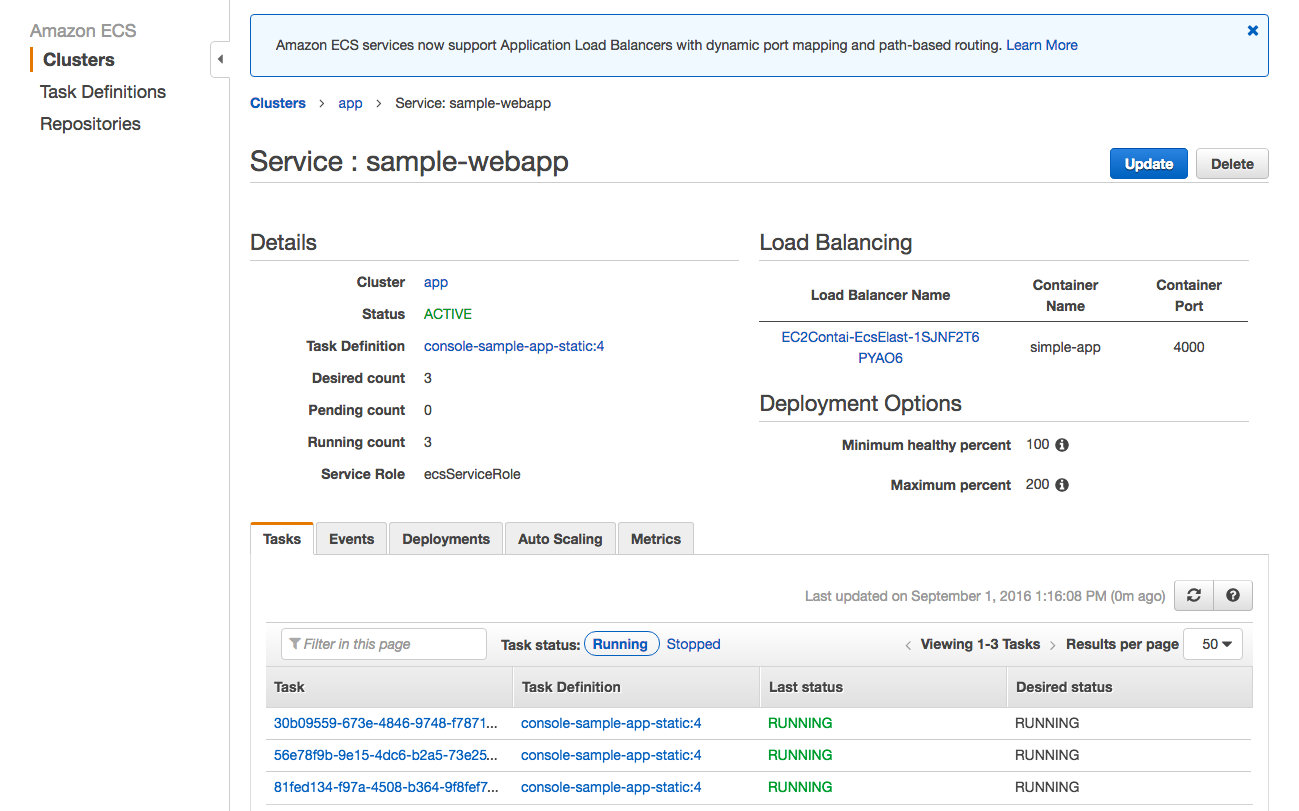
Once your service is functional, you'll see a screen that looks something like this:
Testing the app
You can click on the load balancer name to pull up its details. There, you should find its public domain name. Put that in your browser and you'll see our sample app.

If you refresh a few times, you'll see that the hostname changes. That's because the load balancer is balancing your requests across all three hosts.
Cleaning up
The ECS wizard created a lot of resources in your AWS account just now. You probably don't want to leave them there. They'll clutter things up, and may cost you money.
Fortunately, the ECS wizard uses CloudFormation to create all of its resources. That means you can delete everything simply by removing the CloudFormation stack.


