I'm going to tell you something very personal, and I hope you won't make fun of me. I love comments. Big chunky block comments. Small, concise inline comments. I love them all. When you're really trying to understand a code-base nothing beats well-written, extensive annotation.
Of course there are issues. Most of the time, people don't maintain comments, or they do it in a half-assed way. Some people are good developers but poor writers. Yes, there are issues, and often the sensible approach is to avoid comments altogether. But we're not going to be doing that today.
The Project
I've always been fascinated by emulators, and when Yusuke Endoh released Optcarrot, a NES emulator written in Ruby I knew I had to take a look.
For the past three months, on nights and weekends, I've been poring over the source, figuring out just how an NES emulator works. I've also been writing pretty extensive annotations.
Since I'd like to publish these annotations one day, I need a documentation generator to convert the source files into a website. Here are my criteria:
- It should output HTML displaying both annotations and the full highlighted source code.
- It should support markdown.
- It shouldn't force me into any rdoc-like format.
To meet these requirements, I decided to use Docco. It bills itself as a "quick and dirty documentation generator" and was originally used to generate the documentation for underscore.
The only problem with docco is that it's a little too bare-bones. When working with other static site generators I've gotten used to niceties like built-in servers and live-reload. Fortunately for us, it's quite easy to use Gulp to add these features.
Installing the packages
Make sure you have node and npm installed. If you don't, none of the following steps will work.
Next, create your project directory and initialize a node project:
mkdir doccoblog
cd doccoblog
npm init -y
Now we're ready to install the packages we'll need:
npm install -g gulp
npm install --save gulp-docco gulp-livereload st
As you can probably guess, most of the heavy lifting in our system will be done by gulp and the gulp-docco and gulp-livereload plugins.
The directory structure
We're going to put our source files in src and the resulting HTML files in dest. There's nothing magic about these directory names. We'll configure them later. But for now, we'll create the directories and add a simple source file to src.
mkdir {src,dest}
Here's the sample source file, in src/sample.rb:
# ## Sample: this class doesn't do much.
#
# Here's a description about what this class may
# or may not do. It turns out it just sets `@foo` to
@ `"bar"`
#
class Sample
  def initialize
    @foo = 'bar'
  end
end
Configuring gulp
If you're not familiar with Gulp, it's a tool used to build static assets like JS, HTML and CSS files. Much like Ruby's rake command, Gulp doesn't do anything on its own. Instead, you have to tell it what to do by writing tasks in gulpfile.js.
Let's create a gulpfile.js and add our tasks:
var gulp = require('gulp'),
    docco = require("gulp-docco"),
    livereload = require('gulp-livereload'),
    st = require('st'),
    http = require('http');

var source = "src/*.rb"
var destination = "dest"

gulp.task('build', function() {
  gulp.src(source)
    .pipe(docco())
      .pipe(gulp.dest(destination))
      .pipe(livereload());
});

gulp.task('watch', ['serve'], function() {
  livereload.listen();
  gulp.watch(source, ['build']);
});

gulp.task('serve', function(done) {
  http.createServer(
    st({ path: __dirname + '/' + destination, cache: false })
  ).listen(8080, done);
});
As you can see, we've defined three tasks:
gulp build: Builds the documentation and places it in/destgulp watch: Serves the documentation athttps://localhost:8080and rebuilds it when the source files change. Also supports live-reload via browser plugin.gulp serve: Serves the documentation, but doesn't build it or watch for changes.
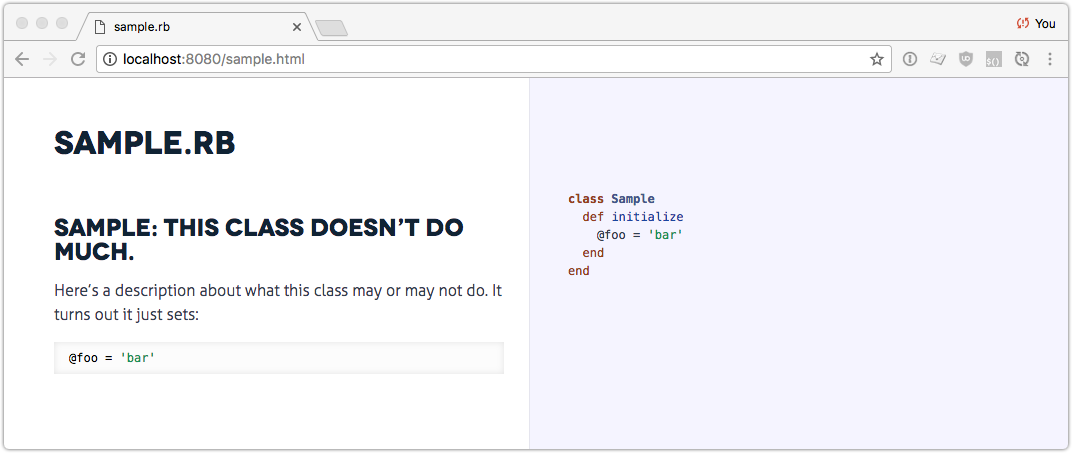
If I run gulp watch then open my browser to https://localhost:8080/sample.html I'll see that my documentation has been built:

If my browser has the livereload extension installed, changes to the source files will cause the browser to automatically refresh, meaning that I can easily check to see if my annotations look good in their rendered form.


